How to Fix Your Mac’s Loose Display
There are very many reasons why Macs and laptops in general are highly convenient devices to own. For one, they tend to be more affordable than desktops, come in a wide variety of sizes, and are extremely portable to carry around. This makes them the perfect devices especially for those who are constantly on the move eg. campus students. remote workers, etc. You can carry out work from anywhere, listen to music, or watch videos using AirPods or anc true wireless earbuds. And even conduct presentations, among many other things. All this comes down to the convenience and portability being offered by these machines. And one of the key components that allow for this extreme portability is the hinge that allows your Mac to fold like a notebook. However, the problem is that as time passes or perhaps due to accidental damage, that hinge can become loose. As a result, your Mac can start to feel wobbly or loose whenever you open or close it. 
Now, it is usually very easy to deduce when the hinge on your Mac is loose and needs to be tightened. For one, any MacBook Pro or MacBook Air with a perfectly functioning hinge is normally tight and offers up a stable feel to it. This means that your Mac won’t be difficult to open or close, but that it also won’t be so easy to swing open at the same time. After all, some level of friction is necessary to keep the display in place at any angle you like.
Moreover, if the display starts to move up or down anytime that you have it open, that is a clear sign that you need to tighten your hinge. Another major sign, is if your display slams shut so easily when you try to close it or if you turn your Mac upside down and the screen starts to swing open. Additionally, if your Mac may have experienced some sort of damage recently, eg. after falling from your desk or workstation, that could also lead to loose hinges. This in turn, would end up affecting your user experience significantly. In fact, it is often for this reason that it is recommended that you purchase a laptop stand from a reputable brand like Lention. These accessories are highly recommended, as they will securely keep your Mac stable on any desk or workstation. Plus, they also offer adjustable angles and height to accommodate any kind of work or play.
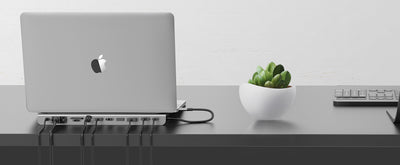
Either way, whatever caused your Mac’s hinges to loosen, there are often two possible solutions that you can take. For one, many users opt to use a dual display docking station. This is because these accessories allow users to expand the level of ports on their Macs and connect multiple external devices at the same time. For instance, if you own a Mac Air then you can purchase one of the best docking station for macbook air that you can find. And connect your device to multiple external monitors to expand your workstation. This is an alternative solution that you can use if your Mac’s display hinge is proving to be bothersome. The second option, is to fix it, but seeing as many users may not know how to do that, we decided to dive into how you can fix this problem quickly and easily.
Take It To A Professional
Despite the fact that tightening the hinge on your Mac can often be a simple thing, sometimes it’s best to take it to a certified repairman instead. This is especially true if your Mac has a warranty or comes with a valid Protection Plan. In which case, you can take it to be repaired at almost no charge. Plus, the benefit of taking it to to a qualified repairman is that you know they will fix your device perfectly. Moreover, it gives you an opportunity to address any other problems you may have, be it hardware or software related. Additionally, not everyone will feel comfortable opening up their Mac, especially if they are beginners, and do not have the right tools to maintain it.
DIY Repair
As mentioned before, the process of fixing your Mac’s hinges is actually quite simple, despite it seeming intimidating. You only have to follow the steps we outline below and you’re all set.
1. Open Up Your Mac
There will normally be about 10 tiny screws to unfix in the under-carriage of your Mac. Simply remove them one at a time, until you are able to easily unhook the Mac’s bottom case.
2.Unseat The Clutch Cover
The next step is to unlatching the plastic strip that covers where your Mac’s hinges are located. You can easily accomplish this if you own a Mac repair toolkit. If you don’t, then you can easily purchase one online, like this tool set from iFixit.
3. Tighten The Hinges
Once step two is complete, you can start to tighten the hinges and fix the issue. In most cases, you can locate these screws on both ends of your display. However, there are some Mac models that come with two screws and others with four. Moreover, if any of the screws seem loose or broken, the you may need to replace the screws with new ones instead.
4. Put All The Components Back
Once you are done, you can then begin to reassemble your Mac. Simply put back the clutch cover, return the lower case of your Mac back and screw everything back in place. It’s that simple!


Leave a comment